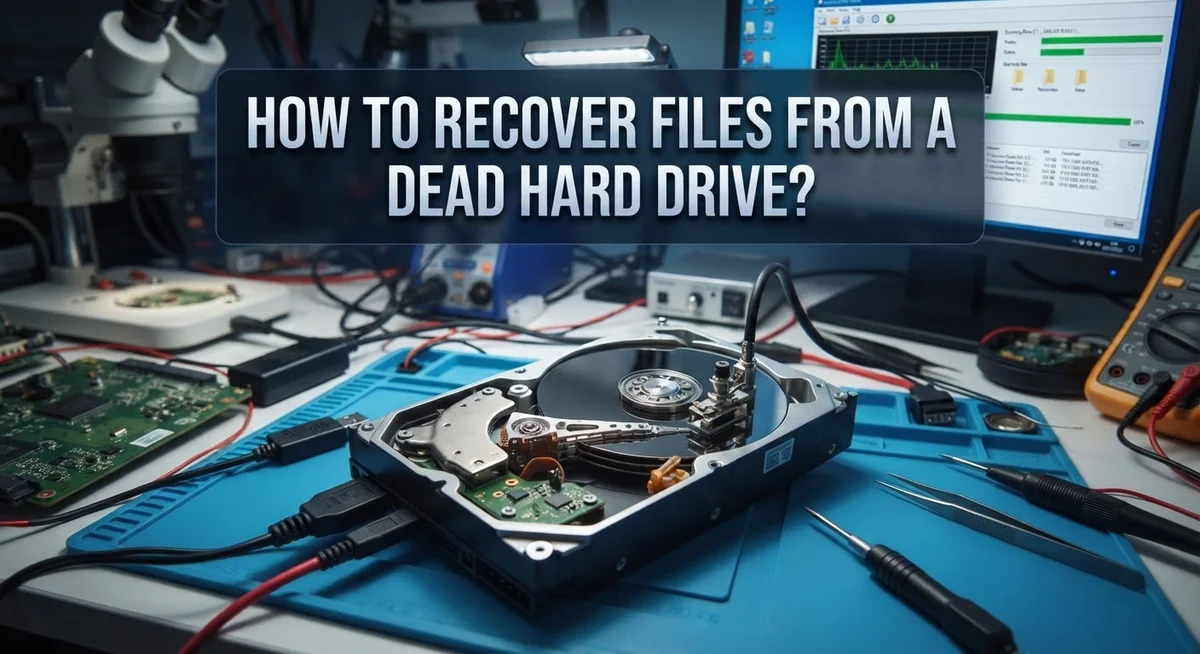
How to Recover Files From a Dead Hard Drive: Step-by-Step Guide
Your hard drive just died and your files feel gone forever. That sinking feeling hits fast, especially when you have photos, work files, or important documents on that drive.
Here’s the good news. Dead does not always mean lost.
Many hard drive failures fall into two camps: mechanical damage or logical failures. Each type needs a different approach.
If your drive clicks, grinds, or makes odd noises, that signals mechanical trouble. This type needs professional help, not DIY fixes.
But if your drive simply stopped showing up or won’t boot properly, you might have a logical failure. These cases often respond well to recovery software.
This guide walks you through the entire process. You’ll learn how to identify what kind of failure you’re dealing with.
We’ll cover safe steps to try before calling in professionals. You’ll also discover which mistakes make things worse, like repeatedly powering on a failing drive.
By the end, you’ll know exactly when to attempt recovery yourself and when to stop and protect your data by seeking expert help instead.
In a Nutshell
Here’s a quick summary to keep in mind as you move forward:
-
Check the damage type first. Clicking or grinding sounds mean mechanical failure. No sound but no recognition often means a logical issue.
-
Stop powering on a failing drive. Repeated power cycles can cause more harm. A full shutdown protects your data better than a restart.
-
Try a USB enclosure for logical failures. Connect the drive to another computer safely. This step often reveals if your files are still accessible.
-
Use recovery software only for logical issues. This works well when the drive is recognized but acting strange. It won’t help with mechanical damage.
-
Never attempt DIY fixes on mechanical damage. Clicking or grinding means you need a professional. Trying it yourself can destroy your files permanently.
-
When in doubt, stop and store safely. Professional recovery keeps your options open. Acting carefully now saves your data later.
Following these steps helps you avoid common mistakes. You’ll know exactly when to try recovery yourself and when to call in the experts.
Understanding Why Hard Drives Fail: Mechanical vs. Logical Damage
Hard drives fail in two distinct ways. Understanding which type you’re facing determines whether you can recover files yourself or need professional help.
Mechanical damage happens inside the drive’s physical components. The spinning platter, read/write head, or motor can break down. You’ll hear clicking sounds, grinding noises, or beeping when this occurs. The drive may not spin up at all. Once mechanical damage starts, the situation gets worse each time you power on the drive. Every startup risks further destruction of delicate parts.
Logical failures are different. The hardware works fine, but the file system corrupts or the drive’s firmware fails. Your computer might not recognize the drive. Files may disappear. The drive could stop booting. The good news: logical failures often respond to software solutions.
Here’s how to tell them apart. Listen carefully when you turn on your computer. Clicking or grinding means mechanical trouble. If the drive spins normally but doesn’t appear in your system, that’s likely logical failure.
Why this matters for recovery: Mechanical damage requires professional technicians with clean rooms and specialized tools. They can replace broken parts and extract your data safely. DIY attempts on mechanically damaged drives almost always make things worse.
Logical failures are your chance to recover files yourself. The drive’s hardware still functions. You just need the right software and proper connection method.
The key step is stopping immediately if you hear mechanical sounds. Power off your computer completely. Don’t restart or try again. Store the drive safely in a cool, dry place. Repeated attempts at powering on a mechanically damaged drive destroy more data and increase professional recovery costs.
For logical failures, you have time to try safe recovery methods before seeking help. This distinction saves you money and protects your files.
How to Diagnose Your Dead Hard Drive Before Taking Action
Before you attempt any recovery method, you need to know what actually went wrong with your drive. This diagnosis step saves you time and prevents further damage.
Listen carefully to your drive. Power it on once and pay attention to the sounds it makes. A clicking or grinding noise means mechanical failure. Stop immediately and do not power it on again. These sounds indicate internal parts are damaged. Professional recovery is your only option here.
If your drive is silent but simply won’t boot or show up on your computer, you likely have a logical failure. This is software or file system damage, not physical damage. You have a better chance of recovering your files yourself.
Check if your computer recognizes the drive. Connect your hard drive to another working computer using a USB enclosure or external adapter. This tells you if the drive has recognition issues. If the second computer detects the drive, logical failure is likely. If it still doesn’t show up, the problem may be more serious.
Look for warning signs before failure. Did your drive make unusual noises before it stopped working? Did you see error messages? Did files become corrupted or inaccessible? These clues help you understand the damage type.
Pay attention to when the failure happened. Did it happen suddenly during normal use? Did it follow a power outage or physical bump? Sudden failures often signal mechanical problems. Gradual slowdowns typically point to logical issues.
Write down all details. Document what you heard, what you saw, and what was happening when the drive failed. This information helps you decide your next step. It also helps professionals if you eventually need their services.
This diagnosis phase takes just minutes but guides your entire recovery strategy. You’ll know whether to proceed with DIY methods or stop and seek professional help immediately.
Step-by-Step: Connecting a Dead Drive via USB Enclosure
A USB enclosure is a simple plastic or metal case that holds your hard drive and connects to another computer. This method works well for logical failures where the drive’s electronics or file system are damaged, but the physical parts still spin normally.
Start by gathering what you need. You’ll need a USB enclosure that matches your drive’s size (2.5 inch for laptops, 3.5 inch for desktops), a working computer, and a USB cable. Power off your dead computer completely. A full shutdown is important, not just a restart.
Remove the hard drive carefully. Open your computer case or laptop according to its design. Disconnect the power and data cables from the drive. Take note of the cable positions so you remember how to reconnect everything later if needed.
Place the drive in the USB enclosure. Slide the drive into the enclosure following the included instructions. Make sure it sits flat and all connectors align properly. Secure any screws or clips that hold it in place.
Connect to a working computer. Plug the USB cable from the enclosure into a USB port on your working computer. Do not use USB hubs; connect directly to the computer for better power and data transfer.
Wait for recognition. Your working computer should detect the drive within 30 seconds. Check your file manager or disk management tools to see if the drive appears. If it shows up, you can now try recovery software on the files.
If the drive still doesn’t appear after 2 minutes, try a different USB port on the working computer. If it remains unrecognized after trying multiple ports, stop here. This suggests mechanical damage, and professional recovery is your best option.
Using Recovery Software to Retrieve Files From an Accessible Drive
Once your dead drive connects to a working computer through a USB enclosure, recovery software becomes your best tool. This software reads the drive’s file system and finds files that are still there, even if your computer can’t access them normally.
Start by choosing the right software type. File recovery tools work by scanning the drive for file signatures. Your operating system doesn’t need to recognize the drive for this to work. The software searches the raw data and rebuilds files based on how they’re stored.
Connect the drive and let your computer fully recognize it. You may see it appear as a new storage device. Some drives show up immediately. Others take a few minutes. Don’t unplug it if nothing appears right away.
Open your recovery software on the working computer. Select the dead drive from the list of available storage devices. Do not select your main system drive by mistake. Double check the drive size and name to confirm you’re scanning the right device.
Run a full scan rather than a quick scan. Quick scans check only recently deleted files. A full scan examines every sector of the drive. This takes longer but finds more files, especially if the drive has been used for a while.
Preview files before recovery. Most software lets you see what it found. Check if your important files appear in the results. This confirms the software can actually recover what you need.
Save recovered files to a different drive. Never save them back to the same dead drive. Use an external drive or your working computer’s storage. This prevents overwriting any data still on the failing drive.
Stop immediately if the drive makes clicking or beeping sounds. These noises mean mechanical damage. Software cannot help with this problem. Professional recovery is your only option.
When to Stop: Signs You Need Professional Data Recovery
Knowing when to stop trying yourself and call a professional is critical. Continuing with DIY attempts on the wrong type of failure can make recovery impossible later.
Clicking, beeping, or grinding sounds are your biggest warning signs. These noises mean your drive has mechanical damage inside. The read/write head is hitting the platter, or the motor is failing. Every time you power on a clicking drive, you cause more physical damage. Stop immediately and do not attempt software recovery.
Repeated power failures after multiple restarts suggest serious mechanical issues. Your drive may have a failed circuit board or internal component damage. If the drive won’t stay on for more than a few seconds, professional help is your only option.
The drive spins but makes no sounds and never appears on any computer often indicates both logical and mechanical problems. Try connecting it via USB enclosure one time to another working computer. If it still doesn’t show up after this single attempt, stop trying. Continued efforts waste time and risk further damage.
Burning smells or visible damage to the circuit board mean stop immediately. Do not power on the drive again. Physical damage this severe requires a clean room environment for recovery.
Your drive was exposed to water, extreme heat, or physical impact before failure. These situations almost always involve mechanical damage. Professional recovery technicians have the tools and environment to safely open and repair your drive.
The key rule is simple: if your drive makes strange sounds or shows no signs of life after one USB connection attempt, stop powering it on. Store it safely in a cool, dry place. Professional data recovery services can often recover files from drives that DIY methods cannot. Stopping early preserves your best chance of getting your files back.
Common Mistakes That Make Data Loss Worse
Mistakes during hard drive recovery can permanently destroy your data. Understanding what NOT to do is just as important as knowing the right steps.
The biggest error is repeatedly powering on a dead drive. Each time you restart your computer or press the power button, you risk causing more damage. Mechanical parts grind further. Electrical components degrade. Data becomes harder to recover. Stop after your first attempt fails.
Another critical mistake is attempting DIY recovery on mechanically damaged drives. If you hear clicking, beeping, or grinding sounds, your drive has internal hardware failure. Opening the drive yourself in a non sterile environment introduces dust and debris. This contaminates the delicate components inside. Professional recovery becomes impossible or extremely expensive afterward.
Many people ignore warning signs and keep trying. Your drive makes strange noises but you ignore them. You see visible damage to the circuit board but power it on anyway. You expose the drive to water or extreme heat, then attempt recovery immediately. These actions worsen the situation significantly.
Connecting a dead drive to the same failing computer repeatedly is another mistake. The original computer may have electrical issues that damaged the drive initially. Reconnecting it there can cause additional harm. Always use a different, working computer with a USB enclosure instead.
Never open the drive yourself unless you work in a clean room environment. Dust particles are invisible to the naked eye but destroy read/write heads instantly. One speck of dust can make professional recovery impossible.
Finally, waiting too long before seeking help is problematic. The longer a damaged drive sits, the greater the risk of component failure. If you suspect mechanical damage, store the drive safely and contact professionals promptly. Acting quickly preserves your recovery options and increases success rates.
Troubleshooting Common Recovery Issues
When your hard drive stops working, several common issues can block recovery efforts. Understanding these problems helps you know whether to continue trying or seek professional help.
Drive Not Recognized by Computer is one of the most frequent issues. Your computer simply doesn’t detect the drive when you connect it via USB enclosure. This happens because the drive’s controller board may have failed or the connection isn’t secure. Try connecting the drive to a different computer first. Sometimes the original computer has USB port problems. Ensure you use a quality USB enclosure and check all cable connections twice. If the drive still doesn’t appear, the controller board likely needs professional attention.
Clicking or Beeping Sounds mean you should stop immediately. These noises indicate mechanical damage inside the drive. The read/write head is hitting the platter or the motor is failing. Continuing to power on the drive causes more damage. Stop using it and store it safely for a professional recovery service.
Software Scans Find No Files can happen even when the drive connects. This usually means the file system is corrupted or the drive has logical damage beyond what recovery software can handle. Run a full scan instead of a quick scan. Full scans take longer but search more thoroughly. If results are still empty, professional recovery becomes necessary.
Slow Performance During Recovery frustrates many people. The drive may respond very slowly or freeze during scanning. This indicates the drive is struggling. Allow extra time for scans to complete. Avoid interrupting the process. If the drive becomes completely unresponsive, disconnect it and stop attempting recovery.
Partial File Recovery means some files appear but others are missing or corrupted. This is normal with logical failures. Save whatever files recover successfully to another location immediately. Don’t attempt multiple recovery passes on the same drive.
Final Thoughts
Recovering files from a dead hard drive comes down to one key skill. You must tell the difference between logical failures and mechanical damage.
Logical failures often respond well to recovery software. You can fix these problems yourself with patience and the right tools.
Mechanical damage tells a different story. Clicking sounds, grinding noises, or a drive that won’t spin mean professional help is your only safe option.
The biggest lesson here is restraint. Every extra power cycle on a failing drive risks more damage.
Turn off the drive completely once you notice trouble. Do not restart it hoping the problem fixes itself.
Remove the drive carefully and connect it through a USB enclosure. This simple step lets you test recognition without stressing the drive further.
If the drive shows up, back up everything right away. Create a full copy before running any deeper recovery software.
If nothing happens, or if you hear strange sounds, stop immediately. Store the drive safely and contact a data recovery professional.
Professionals have tools and clean room environments that protect your data. They can often recover files that DIY methods would destroy.
Time matters too. The longer you wait after a failure, the harder recovery becomes.
Acting fast, but carefully, gives you the best chance of saving your files. Speed without caution often causes more harm than good.
Think of dead hard drive recovery as a two path decision. One path leads to software and USB enclosures. The other leads straight to expert support.
Choosing the right path early protects your data and your wallet. It also saves you from stress later.
Stay calm, assess the damage, and act with care. This mindset gives your files the best possible chance of survival.
Frequently Asked Questions
Can I recover data myself from a dead hard drive?
It depends on the type of failure. Logical failures (corrupted files, deleted data, software issues) may respond to recovery software if your drive connects to another computer. Mechanical failures (clicking sounds, no power response) require professional help. Attempting DIY recovery on a physically damaged drive can destroy your data permanently.
What should I do if my hard drive isn’t recognized by another computer?
First, try connecting the drive through a USB enclosure to a different working computer. This external connection method works better than internal connections. If the drive still doesn’t appear, stop attempting connections. Repeated power cycles can worsen the damage. At this point, professional recovery is your best option.
Why do I hear clicking or beeping sounds from my hard drive?
These sounds indicate mechanical damage. Clicking means the drive’s read/write head is failing. Beeping suggests power issues or component failure. Both require immediate shutdown. Do not power on the drive again. Continuing to run a mechanically damaged drive destroys more data with each startup. Professional recovery services have the tools to safely extract your files.
What if recovery software finds no files on my drive?
This can happen for several reasons. The drive may have suffered logical damage beyond software recovery capability. The file system might be corrupted beyond recognition. The drive itself may not be connecting properly. Before giving up, try the drive on multiple computers using different recovery software. If results stay the same, professional services can often succeed where software cannot.

Dillip is the founder and editor of Switch & Size, where he breaks down tech products, accessories, and gadgets to help readers make smarter buying decisions. With a passion for testing and comparing the latest technology, he delivers honest reviews, in-depth guides, and side-by-side comparisons that cut through the marketing noise.