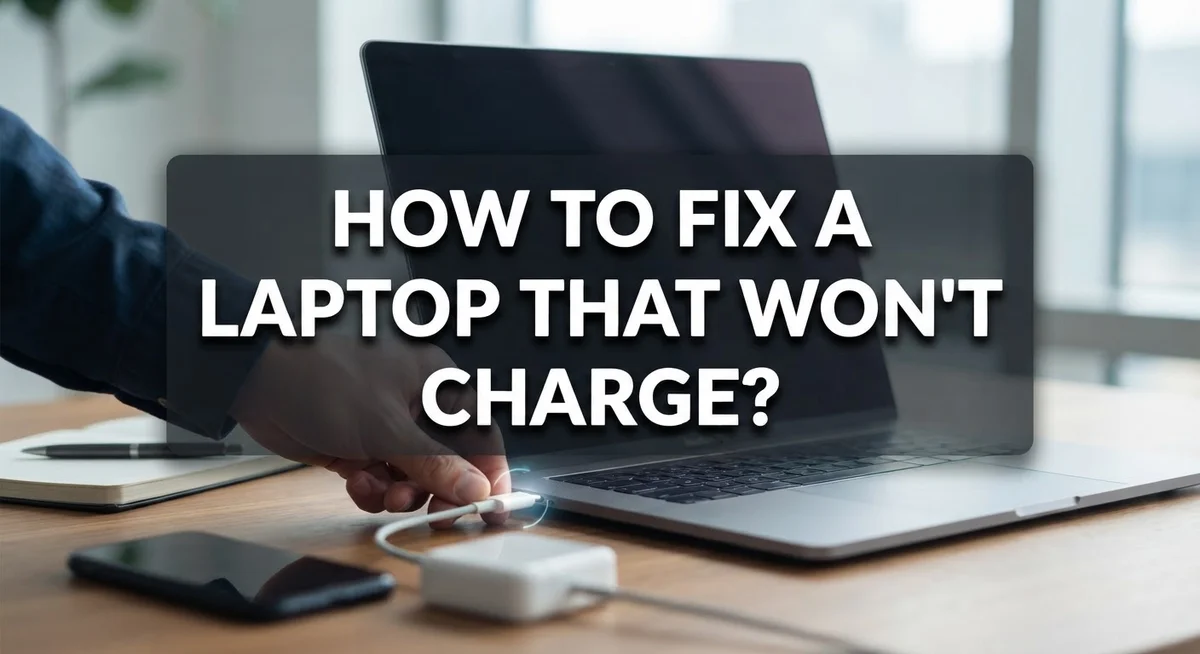
How to Fix a Laptop That Won’t Charge: Complete Troubleshooting Guide
Your laptop battery shows zero percent and the charging light stays off. You plug it in again. Still nothing happens.
This problem feels frustrating, especially when you need your laptop right away. The good news is that most charging issues have simple fixes.
Sometimes the problem is a loose cable. Other times, dust hides inside the charging port. A few issues come from outdated drivers or software glitches on your system.
In rare cases, the battery itself or the motherboard causes the trouble. These problems need more attention, but they are not common.
This guide walks you through every step to fix a laptop that won’t charge. You will learn how to check your charger and cable for damage. You will also learn how to clean your charging port safely.
We will show you simple tricks like performing a hard reset. You will also discover when driver updates can solve the issue.
By the end, you will know exactly what causes charging failures. You will also know how to fix most problems on your own, without any technical experience.
Let’s get your laptop charging again.
In a Nutshell
Here’s a quick recap to solve your charging problem fast.
-
Check all connections first. Make sure the wall outlet works and the charger sits firmly in the charging port. A loose plug often causes the whole issue.
-
Inspect your charger cable. Look for cuts, bends, or frayed wires. Damaged cables rarely charge your laptop properly.
-
Use the original charger only. Third party chargers may not match your laptop’s power needs. This can prevent charging or damage your battery over time.
-
Try a hard reset. Turn off your laptop completely, then leave the charger plugged in. This simple step fixes many charging glitches.
-
Clean the charging port. Dust and debris block proper contact. A quick clean can restore power flow instantly.
-
Update your drivers and BIOS. Outdated software sometimes blocks charging function. Keep your system current to avoid this.
-
Know when to get help. If nothing works, you may face a faulty motherboard or battery issue. A professional repair becomes necessary at this point.
Why Laptops Stop Charging: Common Causes
Your laptop stops charging for several specific reasons. Understanding these causes helps you fix the problem faster and avoid repeating the same mistake.
Loose or damaged charging cables rank as the most common culprit. Over time, cables bend, twist, and develop internal breaks. The outer covering may look fine, but wires inside snap from repeated folding. A loose connection at either end prevents power flow completely.
Dust and debris accumulate inside your charging port over months of use. This buildup blocks the metal contacts from touching properly. Your charger sits in the port, but no actual connection forms between the two surfaces.
Outdated drivers and BIOS software sometimes interfere with charging detection. Your laptop’s operating system communicates with the battery through specific software. When these programs become outdated, your device may not recognize the charger at all, even though power flows correctly.
Faulty motherboard power circuits cause charging failures in older laptops. The motherboard contains the charging control system. If this circuit fails, your laptop cannot accept power no matter what charger you use.
Defective batteries stop accepting charge after years of use. Batteries degrade naturally. A worn battery may no longer hold a connection with the charging system, leaving your laptop unable to charge even with a working charger.
Using non original chargers creates compatibility problems. Third party chargers deliver different voltage levels. Your laptop’s charging circuit may reject power from incompatible sources as a safety measure.
Power outlet failures also play a role. The wall outlet itself may be broken or the circuit breaker may have tripped. Always test the outlet with another device first.
These causes overlap sometimes. A loose cable combined with a dirty port creates stubborn charging issues. Start by checking the simplest causes before moving to more complex hardware problems.
Basic Checks Before You Start Troubleshooting
Before you dive into complex troubleshooting, take a few minutes to check the basics. Most charging problems come from simple issues you can spot right away.
Start by examining your charging cable and power adapter. Look for visible damage like cuts, frayed wires, or bent connectors. Even small tears in the cable can prevent power from reaching your laptop. Flex the cable gently along its entire length. Sometimes damage hides inside the rubber coating.
Next, inspect your laptop’s charging port carefully. Use a flashlight to peer inside the port opening. You may see dust, lint, or debris blocking the connection points. These particles accumulate over time and prevent the charger from making solid contact. If you spot buildup, gently clean the port with a dry cloth or soft brush.
Check that your charger is firmly seated in both the wall outlet and your laptop’s charging port. A loose connection at either end stops power flow completely. Push the charger plug fully into the wall outlet. Make sure the connector sits snugly in your laptop’s port.
Test your wall outlet with another device like a lamp or phone charger. A dead outlet explains why your laptop won’t charge. Try plugging your charger into a different outlet in another room.
Verify you’re using the correct charging port on your laptop. Some models have multiple ports, and only one may handle charging. Check your laptop’s manual or manufacturer website to confirm which port accepts power.
These basic checks take just five minutes but solve most charging issues. You avoid unnecessary troubleshooting and save time. If everything appears normal, you can move forward with more advanced diagnostic steps.
Step-by-Step Guide to Fixing a Laptop That Won’t Charge
When your laptop won’t charge, follow these practical steps to identify and fix the problem.
Start with your power adapter. Examine the charging cable closely for any visible damage like cuts, bends, or exposed wires. Check that the power brick connects firmly to both the wall outlet and your laptop’s charging port. Wiggle the connector gently to ensure a solid connection.
Test your wall outlet next. Plug a different device into the same outlet to confirm it works. If the outlet is dead, try a different one in another room. This step eliminates power source issues quickly.
Inspect your charging port carefully. Look inside the port with a flashlight for dust, lint, or debris. These particles block proper electrical contact. Use compressed air to gently blow out any buildup. Never insert metal objects into the port.
Perform a hard reset. Turn off your laptop completely. Leave the charger plugged in for 15 to 20 minutes without powering on. This resets your system’s power management and often restores charging function.
Update your system software. Outdated drivers and BIOS versions sometimes prevent charging. Visit your laptop manufacturer’s support page and download the latest drivers for your power management and chipset. Install these updates and restart your computer.
Try a different charger. If possible, borrow a compatible charger from a friend with the same laptop model. This confirms whether your original charger is faulty or your laptop has an internal issue.
If none of these steps work, your laptop likely has a hardware problem. A faulty motherboard circuit or defective battery requires professional repair or replacement.
How to Inspect and Clean the Charging Port
Your laptop’s charging port collects dust and debris over time. This buildup prevents proper electrical contact between your charger and laptop. Cleaning the port is often the fastest solution to charging problems.
Start by powering off your laptop completely. Unplug the charger from both the wall outlet and your device. Let everything cool for a few minutes before you begin.
Use a flashlight to look inside your charging port. You’ll see metal pins or connectors inside. Look for visible dust, lint, or any foreign material blocking these connections.
Grab a can of compressed air. Hold the laptop steady and aim the nozzle directly into the charging port. Use short bursts of air to dislodge debris. Keep the can upright while spraying. Repeat this process two or three times until no more dust comes out.
If compressed air doesn’t work, try a soft brush. Use a small, clean paintbrush or an old toothbrush with soft bristles. Gently brush the inside of the port in a back and forth motion. Be careful not to bend the metal pins inside.
Never use metal objects like paperclips or pins. These can damage the delicate connectors permanently. Avoid liquid cleaners or water. Moisture inside your port causes short circuits and more damage.
After cleaning, wait five minutes before reconnecting your charger. Plug the power adapter into the wall outlet first. Then insert the charger into your laptop’s port firmly until you hear a click or see an indicator light.
Test your laptop now. If it still won’t charge after cleaning, move on to checking your charger cable and testing with a different power adapter. The problem may lie elsewhere in your charging system.
Updating Drivers and BIOS to Resolve Charging Issues
Outdated drivers and BIOS versions often prevent your laptop from charging properly. Your system uses these software components to communicate with your power adapter and battery. When they become outdated, this communication breaks down.
Start by checking your current driver status. Go to your device manager and look for any yellow warning symbols next to battery or power-related devices. Yellow symbols mean drivers need attention.
Visit your laptop manufacturer’s support website next. Search for your exact model number. Download the latest chipset drivers and power management drivers. These drivers control how your system handles charging.
Battery drivers deserve special attention too. Download and reinstall them from your manufacturer’s website. Restart your laptop after installation completes.
BIOS updates are equally important. Your BIOS is firmware that runs before your operating system starts. It manages hardware functions including charging circuits. Check your manufacturer’s website for BIOS updates specific to your model.
Before updating BIOS, plug in your charger and ensure your battery has at least 50% charge. BIOS updates require stable power. Never interrupt this process.
Follow your manufacturer’s instructions exactly when updating BIOS. The process varies between brands. Most updates take 10 to 15 minutes.
After updating drivers and BIOS, restart your laptop completely. Leave your charger connected during the restart. Give your system 30 minutes to recognize the updated components.
Test your charging now. Look for the charging indicator light. If charging still fails after these updates, your issue likely involves hardware damage rather than software problems. Consider professional repair at this point.
Common Mistakes That Make Charging Problems Worse
Many people accidentally make charging problems worse by repeating the same mistakes. Understanding what not to do helps you avoid further damage to your laptop.
Using a charger that isn’t original to your laptop causes serious issues. Third party chargers may have different voltage outputs or connector shapes. Even if the charger seems to fit, it can damage your battery or motherboard over time. Always stick with your manufacturer’s charger whenever possible.
Ignoring loose connections is another common error. People often assume the problem is internal when the real culprit is a loose cable. Check that your power brick sits firmly in the wall outlet. Wiggle the connector where it meets your laptop gently to ensure it’s secure. A loose connection stops charging completely.
Skipping port cleaning leads to persistent problems. Dust and debris block the electrical connection inside your charging port. Many people try multiple chargers or take their laptop to repair shops when simple cleaning would fix everything. A quick five minute cleaning with compressed air prevents hours of frustration.
Neglecting driver updates keeps your laptop stuck in charging failure mode. Your system needs current drivers to communicate properly with your battery and power circuits. Outdated software prevents your laptop from recognizing the charger even when everything works fine physically.
Never use metal objects to clean your charging port. Paperclips, pins, or metal picks scratch the delicate connectors inside. This damage becomes permanent and requires professional repair or port replacement.
Finally, avoid forcing your charger into the port. If it doesn’t fit smoothly, stop immediately. Forcing it bends the connector pins and ruins the port. Take time to align it properly first.
Advanced Troubleshooting for Persistent Charging Issues
When basic troubleshooting doesn’t work, you need to dig deeper into your laptop’s hardware and software systems. Advanced techniques require patience and careful attention to detail.
Start by testing with a different charger if you can borrow one from a friend or family member. This step reveals whether your power adapter is truly faulty or if the problem lies elsewhere. If a different charger works, your original adapter needs replacement.
Next, reinstall your battery drivers completely. Open your device manager and find the battery section. Right click on each battery entry and select uninstall. Restart your laptop afterward. Windows will automatically reinstall the drivers fresh, which often fixes charging recognition issues.
Check your BIOS settings through your manufacturer’s support website. Outdated BIOS versions sometimes contain bugs that prevent charging. Download the latest BIOS file for your exact model. Follow your manufacturer’s step by step instructions carefully. Never interrupt a BIOS update, as this can damage your system permanently.
If your power brick feels warm or shows visible damage, suspect a failing adapter. The power delivery circuit inside may be deteriorating. Test the adapter output with a multimeter if you have one available.
Consider motherboard damage if multiple solutions fail. Faulty power circuits on the motherboard prevent charging even with working adapters and batteries. This requires professional diagnosis.
Finally, check whether your laptop charges in safe mode. Boot into safe mode and observe if charging begins. If it does, a software conflict is causing the issue. Uninstall recently added programs or perform a clean boot to identify the culprit.
When these advanced steps don’t resolve the problem, professional repair becomes necessary.
When to Seek Professional Repair
You’ve tried the basic fixes. Your charger works fine. The port looks clean. Your drivers are updated. At this point, you need professional help.
Professional repair becomes necessary when your laptop shows signs of hardware failure. A faulty motherboard power circuit won’t respond to any DIY solution. If your power brick feels extremely hot or shows burn marks, the internal components may be damaged beyond safe repair at home.
Stop troubleshooting when you notice these warning signs. Sparks near the charging port mean stop immediately. A burning smell indicates serious electrical problems. Visible cracks on the motherboard require expert attention. These situations pose safety risks to you and your device.
Multiple failed attempts signal it’s time to visit a technician. You’ve tested different chargers. You’ve cleaned the port thoroughly. You’ve updated every driver and BIOS version available. Nothing worked. A professional can run diagnostic tests your laptop cannot perform alone.
Battery replacement often requires professional tools and expertise. Technicians can test whether your battery is truly dead or if the charging circuit failed instead. This distinction matters because the solutions differ completely.
Find a certified repair center for your laptop brand. Authorized technicians have access to genuine parts and proper equipment. They can identify motherboard damage that you cannot see with your eyes.
Document everything before you visit. Write down exactly what you’ve already tried. Note when the problem started. Mention any physical damage or unusual sounds. This information helps technicians diagnose faster and more accurately.
Professional repair costs money, but it saves your laptop. Continuing to force charge attempts on a failing device risks permanent damage to expensive components.
Final Thoughts
A laptop that won’t charge feels stressful, but most problems have simple solutions. Start with the basics before assuming the worst. Check your outlet, cable, and port first.
Patience matters during this process. Many charging issues come from small things like dust or a loose connection. You don’t always need expensive repairs to fix them.
Think of troubleshooting as a step by step journey. Move from simple checks to more detailed fixes only when needed. This saves you time and effort.
Your charger and battery work together as a team. If one part fails, the whole system struggles. Testing each piece separately helps you find the real problem faster.
Remember that laptops are built differently across brands. What works for one model might not work for another. Always check your specific laptop manual when in doubt.
Regular maintenance prevents future issues. Clean your charging port occasionally. Keep your software updated. These small habits protect your laptop long term.
Don’t ignore warning signs like overheating chargers or flickering charge indicators. These signals tell you something needs attention now, not later.
Trust your instincts if something feels wrong. A laptop that charges inconsistently or shows strange battery behavior deserves a closer look. Waiting too long can turn a small issue into a bigger repair bill.
Every laptop owner faces charging problems at some point. The good news is that most issues are fixable with patience and the right approach.
Stay calm, follow these steps in order, and give each solution a fair chance to work. Your laptop will likely charge normally again soon.
If problems continue despite your best efforts, professional help remains a reliable option worth considering.
Frequently Asked Questions
Why does my laptop charge slowly even when plugged in?
Slow charging happens for several reasons. Your laptop might be running too many programs at once, which drains power faster than the charger can supply it. Try closing unnecessary applications and browser tabs. Heat also slows charging, so make sure your laptop has good airflow around it. Dust buildup inside the charging port reduces power transfer. Use a small brush or compressed air to gently clean the port. Outdated drivers can cause charging problems too, so check your manufacturer’s website for battery driver updates.
Can I use a different charger for my laptop?
Using a different charger is risky. Each laptop needs a specific voltage and amperage to charge safely. A charger with wrong specs can damage your battery or motherboard. If you must test with another charger, only use one designed for your exact laptop model. Original chargers are always the safest choice. Borrowing a charger from a friend with a different laptop brand is not recommended.
What should I do if my charging port looks damaged?
Stop charging immediately if you see visible damage to the port. Bent pins or cracks mean electricity might not flow properly. Don’t force your charger into a damaged port. This can cause sparks or fire hazards. Have a professional inspect the port before using your laptop again. Port replacement requires opening your laptop, so professional repair is the best option here.
How often should I clean my charging port?
Clean your charging port every few months as part of regular maintenance. Dust and debris accumulate inside, blocking electrical contact. Use compressed air or a small soft brush for cleaning. Never use water or liquid cleaners near the port. A clean port keeps charging working smoothly and prevents future problems.

Dillip is the founder and editor of Switch & Size, where he breaks down tech products, accessories, and gadgets to help readers make smarter buying decisions. With a passion for testing and comparing the latest technology, he delivers honest reviews, in-depth guides, and side-by-side comparisons that cut through the marketing noise.